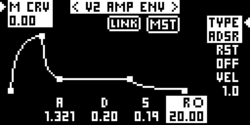
AMP LINK
Let’s start with LINKING the AMP ENVELOPE Controls by holding ALT + Pressing DCO ENV / LINK
This will open a temporary LINK menu where you can choose which Voice’s current AMP Envelope settings will become the MASTER settings for all three Voices.
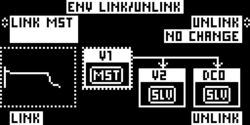
ROTATE the LEFT SCREEN Encoder to scroll through the three available options:
V1, V2, DCO,
Let's select V1 and push the LEFT SCREEN encoder to confirm.
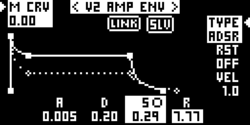
Now you've LINKED all AMP ENVELOPE controls to VOICE 1 which means that V1 AMP ENV settings (ENV TYPE, CURVE, individual Envelope parameters, etc.) will be temporarily applied to all three voices. This is also indicated in the VOICE 1 AMP ENV screen by a “MASTER” label, while the remaining Voice 2 and DCO AMP ENVELOPE Screens will have the “SLV” label.
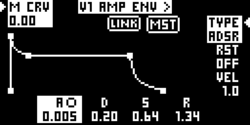
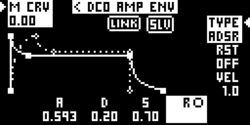
You can now make adjustments to all three voices at once with the V1 AMP ENV ENCODER.
The MASTER Voice’s settings will be instantly applied to all three Voices at the same time.
While all three voices are LINKED to the MASTER Voice, all settings of the SLAVE voices are still kept in the MOTOR Synth’s memory.
This feature can be used as a way to quickly change all AMP ENV settings by RE-LINKING to a different Voice.
Example:
Set VOICE 1 AMP ENVELOPE in AD Mode, whereas the VOICE 2 AMP ENVELOPE in ADSR Mode.
PRESS ALT + DCO ENV / LINK, select V1 as the MASTER and press the LEFT SCREEN ENCODER to Confirm.
Now all three voices will adapt the settings of VOICE 1, and you can use the VOICE 1 AMP ENVELOPE Encoder to make adjustments to all three VOICES at once.
Now to RE-LINK - press ALT+ DCO ENV / LINK again, select V2 as the MASTER and press the LEFT SCREEN Encoder to confirm.
This will instantly change the AMP ENVELOPES of all three VOICES to those of VOICE 2 (the ADSR Envelope) and produce a big change in sound instantly.
This will instantly change the AMP ENVELOPES of all three VOICES to those of VOICE 2 (the ADSR Envelope) and produce a big change in sound instantly.
Essentially - the LINK system allows you to jump back and forth between three different versions of an AMP ENVELOPE.
Additionally, you can silently edit the SLAVE Voices’ settings while LINKED to the MASTER Voice.
For Example - press ALT+ DCO ENV / LINK and set VOICE 1 as the MASTER Voice.
Now press the V2 AMP ENVELOPE Encoder to access the VOICE 2 AMP ENV screen.
While in the VOICE 2 Menu - you will see the SLV Icon, indicating that this is not the MASTER voice.
You can make silent adjustments to the VOICE 2 AMP ENVELOPE settings which will be indicated by blinking lines and values - for example - increasing the Attack and Release times and changing the ENVELOPE TYPE.
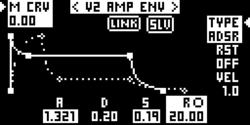
Once you’ve made the changes you wanted to - - you can now press ALT+LINK and select VOICE 2 as the new MASTER Voice.
This will immediately apply the AMP ENVELOPE Settings of VOICE 2 to all three Voices.
